Welcome, beer enthusiasts! If you’ve ever marveled at the perfect pour of a pint or admired the smooth operation of a beer faucet, then you’re in the right place. In this guide, we’re diving deep into the world of beer faucets – from understanding how they work to mastering the art of pouring the perfect beer. So grab a seat, pour yourself a cold one, and let’s uncover the secrets of beer faucets together!
Demystifying Beer Faucets: What You Need to Know
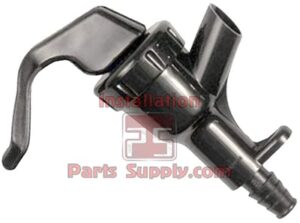
- The Anatomy of a Beer Faucet: Before we dive into the pouring process, let’s take a closer look at the components that make up a beer faucet:
- Spout: This is where the beer flows out of the faucet and into your glass.
- Handle: The handle controls the flow of beer by opening or closing the faucet.
- Shank: The shank connects the faucet to the beer line, allowing beer to flow from the keg to the faucet.
- Internal Mechanism: Inside the faucet, there are valves and seals that control the flow of beer and prevent leaks.
- Types of Beer Faucets: There are several types of beer faucets available, each with its own unique features and benefits. Some common types include:
- Standard Faucets: These are the most basic type of beer faucet, with a simple design and lever handle.
- Perlick Faucets: Known for their smooth operation and reduced sticking, Perlick faucets are a popular choice among homebrewers and professionals.
- Flow Control Faucets: These faucets allow you to adjust the flow rate of the beer, giving you greater control over the pour.
Tips for Mastering the Art of Pouring
- Start with a Clean Faucet: Before pouring your beer, make sure the faucet is clean and free from any residue or buildup. A dirty faucet can affect the taste and quality of your beer.
- Tilt the Glass: When pouring beer from a faucet, always tilt the glass at a 45-degree angle. This helps minimize foam and ensures a smooth, even pour.
- Open the Faucet Slowly: Open the faucet slowly to allow the beer to flow smoothly into the glass. Opening it too quickly can cause foaming and result in a messy pour.
- Adjust the Flow Rate: If your faucet has a flow control feature, experiment with adjusting the flow rate to achieve the perfect pour. This can help control foam and ensure a consistent serving size.
- Finish Strong: As you near the top of the glass, gradually straighten the glass to a vertical position and finish pouring with a flourish. This helps create a nice, creamy head on top of the beer.
Troubleshooting Common Issues
- Sticky Handle: If the faucet handle is sticking or difficult to operate, it may be due to a buildup of beer residue. Clean the faucet thoroughly and lubricate any moving parts to ensure smooth operation.
- Excessive Foam: Excessive foam can be caused by several factors, including dirty beer lines, improper pouring technique, or incorrect serving pressure. Check your beer lines for cleanliness and adjust the pressure as needed to achieve the desired pour.
- Leaks or Drips: Leaks or drips from the faucet can be caused by loose connections or worn-out seals. Tighten any loose fittings and replace any damaged parts to prevent leaks.
Cheers to Perfect Pours!
With the tips and advice provided in this guide, you’re well on your way to mastering the art of beer faucet and pouring the perfect pint every time. So raise your glass, toast to your newfound knowledge, and enjoy the fruits of your labor!